Showing posts with label fun. Show all posts

Sunday, June 2, 2013

Summer Fun

June 1st...

Tho technically not the official first day of summer, it is considered the first day of summer by many. Most kids (tho not my own, they have 4 more days!) are out of school.

With 4 kids I want to make sure that we have fun this summer....but I also don't want to break the bank doing it!

I went to Dollar Tree today (only the best dollar store ever, they are a true dollar store where things are actually a dollar). I bought a TON of stuff for the kids for over the summer. I figure each week I will pull something new and exciting out for them to have. We have new bubbles, sidewalk chalk, puzzles, coloring books, and more.

I started today off by giving my two youngest some sun glasses to wear outside while playing on our swing set in the back yard. My older two are over at a friends house and staying for dinner. The friend is originally from Australia and this coming week when school gets out they are going with their Mom back to Australia for 2 months to see their family and friends back home.

For today tho, I pulled out some finger paint we already had in the house and I let my 2 toddlers have some finger painting fun, followed by a bubble bath. They had a ton of fun, painted some great pictures, and themselves (tho my 4 yr old told me he did not paint his leg...even tho I saw him do it LOL). They made sure to use every single last drop of paint I gave them too!

Here's to more summer fun and making more memories with my kids.


 Riley painting


 Aislinn painting


 Dirty hands....no Mommy, I didn't paint on my leg....LOL


They used ALL the paint I gave them lol


Tuesday, January 29, 2013

Craft Time

Over the last few weeks I've done a couple of crafts with the kids that I found on Pinterest (seriously, if you are not on this site, you are missing out!)  Both these activities have been pinned onto my 'Pinned it, Tried it' board (if you're not following me yet, just click the link on the top right of my blog to follow me on Pinterest!)

The first thing I did was make heart shaped crayons with Jaidan.  This was a trial run, to see how well it worked and how they turned out.  We'll be doing some more for Jaidan to use as Valentine's this year at school.

We had a zip lock baggy with old broken crayons in it that we used (I gave Riley and Aislinn each an old wipes container and put brand new crayons in each container for them, this way they each had their own crayon's and there was no more fighting over crayons!).  First we had to cut up all the old crayons, this was very time consuming...I also should have probably used my wooden or plastic cutting board, not my porous poly cutting boards (lesson learned!)


Once we had enough cut up, we had to fill the trays.  I bought some silicone heart shaped trays at Target in their dollar bins for $3.


Then, we popped them in the oven.  The pin said 230* for 15 mins, but I had to leave them in for 30 mins.


I did stir them with a toothpick at the 15 min mark.  I stirred them again with the toothpick when I took them out.  I put them on a rack to cool (I used my slow cooker's rack).


Normally, I link back to the blog post I followed with my pin.  But in this instance I also used google and read I think 2 different blog posts, their comments, and a forum's post with comments.  So, I kind of read what a bunch other people did and what did or didn't work for them and came up with my own method.  You can find the original pin I used tho on my pinterest board.


Next up, I decided to try the soap cloud with Riley!  Jaidan came in and watched while it was in the microwave.  I had never done this before and was able to get a 3 pack of Ivory soap for $.25, so I decided to do this....Ok, I bought the soap with the intent to do this project LOL.

It's very important that you use Ivory soap, I can't tell you why, but that is what the blog said (supposedly you get a burned mess with other brands)


This is so easy to do.  You just put the soap on some wax, or parchment paper (NOT foil, seriously folks, we don't want any fires!), turn on the microwave and watch it grow!  I set my timer for 4 mins, but we took it out at 2 mins.  It had really slowed down with the growing (couldn't even tell if it was moving anymore), so we did a big huge count down together for the last 10 seconds and took it out at the 2 min mark.


Riley thought it was super cool.....until it came out of the microwave, then he didn't want to hold it LOL.

If you want to see the original blog post you can do so here.  We still have our 'cloud' so I am thinking about letting the kids make colored soaps like she did in her blog post.

Have you done any Crafty fun things lately?


Tuesday, May 29, 2012

Fun in the Sun in San Diego!!

I am so excited!  We are spending our family vacation in San Diego this year!  I use to live in San Diego many years ago...in fact, my daughter Jaidan was born at Balboa Medical Center.  For years she use to tell people she was born at the zoo LOL, since they are both located in Balboa Park.

We are heading out Sunday morning, and then coming back home Friday afternoon at some point.  Today marks 8 years since my husband and I started dating.  Our first date was at Joe's Crab Shack in Pacific Beach, and then watching the sunset over the ocean.  So this Sunday, when we first get to San Diego we are going to take the kids and eat dinner at Joe's Crab Shack <3.

We are going to take the kids to Legoland, Seaworld, and The Wild Animal Park...well, I guess now they call it the Safari park.  We have never been to Legoland, but it is someplace I have always wanted to take the kids, so I am excited to go there.  You just can't go to San Diego and not go to SeaWorld, it's one of my absolutely favorite places to visit.  My Mother's day present is being able to do the Dolphin Interaction that they have!  I am so excited to get in the water with the dolphins, it is a bucket list item for me!!!  For my hubby, for Father's day, he get's to do the Penguin Encounter, Penguin's are his second favorite animal, behind Otter's.  The last time I did the Wild Animal park, my 10 year old daughter was only a few months old, so we are heading back there to check it out again.  As much as I love the Zoo, we are skipping it (it's my favorite zoo ever!!).  I swear I went there 3 times the month before I left San Diego LOL.  We took the older kids there when we first moved back to California 3 years ago, so we decided to skip it this time, so we could do things we haven't done or they don't remember doing.

We'll also be hitting up the 2 hour harbor cruise.  The first hour will take us down by 32nd street Naval Base.  My older 2 kids dad, and I were both stationed there, so I thought it would be nice for them to see the ships.  The second hour goes up by Point Loma Sub Base, which is also where I was stationed.  Hoping they get to see a sub....even better if the ARCO has a sub in Drydock!!  the ARCO is where I spent my last 2 years in San Diego.  I am excited to grab some Carne Asada Fries from Santana's over in point Loma...best Carne Asada Fries EVER!!! LOL

We'll also hit up Mission Beach and spend some time in balboa Park.  We're going to go to Reuben H. Fleet Science Center, and the Botanical Gardens too.  there is just so much to see and do at balboa park.  I'm also going to show the kids around and show them where we use to live.

I am so excited to be going back to San Diego even if it's only for a few days.  It was my favorite place to live, and if it wasn't for cost of living, that is where I would love to live.

Are you going anywhere special on vacation this summer?

Thursday, February 2, 2012

Homemade Finger Paints

Ok, so I saw this recipe posted on an image on Facebook.  I'm sure it's on pintrest somewhere, but I don't want to lose it, so I am going to share it here, where I can always find it lol.  Maybe the kids and I will make some this weekend or next weekend.

Ingredients:

3 Tbs sugar
1/2 tsp salt
1/2 C corn starch
2 C water

Directions:

Combine ingredients in small saucepan. Warm until mixture thickens.  Cool and pour in containers.  Add food coloring to create desired colors.  Enjoy.


Thursday, January 26, 2012

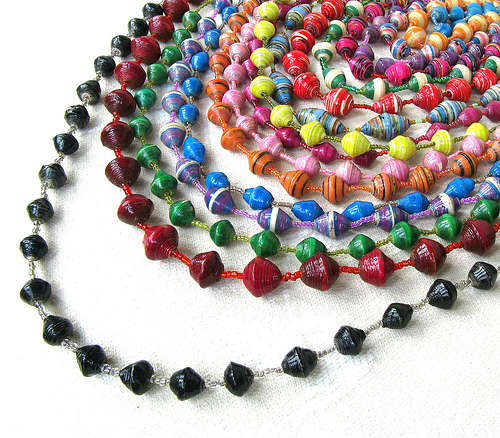
How To Make Recycled Newspaper Beads

I saw this post on another blog Freetail Therapy and I loved the idea!  It sounds really easy to do.  Being a couponer, I have a LOT of extra newspaper that we recycle.  So I am going to try this out, I am sure my kids will love helping me with this project.  To see the original post go HERE.  I will do another post after we try this out, to let you know how it goes!  If you go to her site, you can also pin this to pintrest (which of course, I already did!).


Materials
Old newspapers Large pot or metal bowl Glue (Elmer’s or other liquid glue) Sandpaper A drill to make holes in the beads Whatever string or ribbon you want to string the beads with Leftover paint Varnish
Directions
1. Grab a few newspapers before they make it to the bin or recycling basket. Try a couple different papers for different colors. The Sunday comics might be interesting!
2. Rip the newspaper into small pieces in a large stock pot or metal bowl.
3. Cover the paper pieces with boiling water (easy if you have a kettle on hand).
4. Allow this mixture to sit for an hour or more, stirring occasionally.
5. Drain the water using a strainer or try to get as much water as possible out with the lid of the pot.
6. With the paper back in the pot, add enough glue so that the mixture sticks together.
7. Squeezing water out with your hands, roll the mixture into balls. You can make the balls as big or small as you like.
8. Place the balls on parchment paper or foil.
9. Roll them several times a day for several days as they dry. Roll them every 3‐4 hours for a couple days for compact beads.
10. When completely dry, use the sandpaper to sand off any rough points on the bead.
11. Drill a hole through each bead for stringing. Bigger holes can accommodate ribbons and the like.
12. You can now paint the beads with any paint you have on hand. When dry, you can varnish them with Mod Podge, clear acrylic spray, or other varnish. For a great painting and drying rack, cut small notches into a shallow cardboard box, such as a shoe box. This will catch any drips when you paint and varnish the beads. Place long needles, coffee stirrers, or sturdy wire through the beads and secure in the notches of the box.
13. When dry, string the beads. Ribbons work especially well for these chunky beads, but you can experiment with other materials.
Enjoy your recycled newspaper beads!